.gobump img{ border: 5px solid #ccc; float: left; margin: 15px; -webkit-transition: margin 0.5s ease-out; -moz-transition: margin 0.5s ease-out; -o-transition: margin 0.5s ease-out; border-radius: 5px 5px 5px 5px; } .gobump img:hover { margin-top: 2px; }

twitter

Sunday, August 9, 2009

Creating a custom header for stretch templates

it is a little more difficult to effectively create a custom header for stretch templates as the width of such templates is fluid. However, with a few simple tricks, you can easily create a unique, clickable header for your blog which will look great no matter how wide (or narrow) the browser viewing your blog.

I’m going to use the Minima Stretch template, though I
will also include notes applicable t
o the Denim Stretch template too.

The best way to use a custom header for a stretch template…
…is to create a logo or header image with a block background color !

This ensures that your header wi
ll appear normally in any size of browser window, whether this is a narrow monitor or widescreen laptop.

An effective method is to use a logo or badge, alongside your blogs’ title. If you ensure the width of the whole “banner ” is no wider than around 700px, you can be certain that the whole header will display properly in older browsers.

I used Photoshop to create the header for this demonstration, though you could just as easily use GiMP, CorelDraw or your favorite image editing program10.
Firstly I created a background which is 700 pixels wide and 100px tall.

You can make your own header banner taller than this if you prefer.

Then, I filled the background with a dark red color (hex value: #333333).

Ensure you have the hex value of your background color as you will need to use this value later on in this tutorial.

Secondly, I added the blog title in white text11 with a little shading to ensure this stands out from the background (there are loads of excellent free fonts available from DaFont12).

I aligned this title to the right o
f the image, leaving space to the left so I can add a logo afterwards.
Here is what the header banner looks like at this stage:
Now

Now I’d like to add a contrasting logo to the left of the header title, which will add some personality to the head section of the design. If you already have your own logo, you can simply paste this beside your header. However, for this template I’m going to use a badge style logo created using the free service from FreshBadge.com13. I created a badge using variants of red, and changed the size to 70pixels in height. Then I pasted this badge into my header banner, to the left of the title text, and saved the completed banner in GIF format:


Upload your image to Blogger To use this banner as the header, we will upload this to Blogger using the in-built image upload feature. Simply go to Template>Page Elements in your Blogger dashboards and click on the “edit” link in the header widget.

Choose to upload a new image from your computer and browse to the location where you have saved your custom banner design.

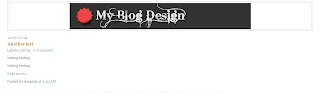
Upload this to Blogger, and check the radio box
which says “Use instead of title and description”.

This ensures that your blog’s name will still appear in the top right of your browser, but nothing will interfere with the appearance of your new header banner. After uploading my header to Blogger, the template appears like this:


Blend the banner with the background of the header So far, the header banner doesn’t blend with the background of the header at all. We need to add a background color to the header section which is the same value as the background of our banner, which ensures it blends seamlessly.

To do this, go to Template>Edit HTML in your blogger dashboard, and find the following section of code near the beginning of the section: #header -wrapper { margin:0 2% 10px;
border:1px solid $bordercolor; } Here we will add a background color with the same hex value as the background of the banner (in my example, this is #333333). So add the line highlighted in red to this section of code, substituting the hex value for that of your own banner background color: #header -wrapper { margin:0 2% 10px; background: #333333; border:1px solid $bordercolor; } Now, my demonstration template looks like this:


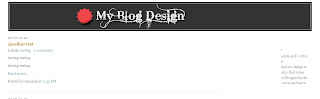
Now this is looking better, wht say........................................

Thursday, June 25, 2009

WEB HOSTING AT MAKEMYHOST.COM AT 50% OFF


Welcome to our

WWW.MAKEMYHOST.COM


We understand that quality of linux hosting, dedicated hosting, eMail hosting customer support is mission critical for our mutual success and we will always offer live in-house support 24x7x365 even on holidays.

Our average support ticket resolution is 15 minutes and immediate responses are very common. We are dedicated to taking away the headache of administering your own servers, thus allowing you to focus entirely on running your business with unlimited growth potential.

Along with providing quality and reliable Linux hosting solutions we offer full range of other web hosting services, including: dedicated hosting, Mail hosting.

Our special security packages will help to secure the server 100% hack free, Spam free, Ddos free We are absolutely sure that such winning combination of price, quality and reliability of Linux hosting ,dedicated hosting and eMail hosting services you won’t be able to find anywhere else in the industry.


Browse our web hosting areas and choose the best plan that will suit all your needs. MakeMyHost values every single client we have.

We listen and we want to hear from you.
If you have any questions regarding any of our linux hosting or dedicated hosting, eMail hosting – feel free to contact us.Thank you for choosing MakeMyHost your web hosting provider!

Creating a Directory in Linux

The mkdir (make directory) command is used to create directories.

Example
[ Steve@localhost Steve ] $ mkdir prog-files
[ Steve@localhost Steve ] $ -

The sub-directory, prog-files, is created under the current directory. However, the new directory does not become the current directory. Complete path names can be specified with mkdir.

Example

[ Steve@localhost Steve ] $ mkdir /tmp/prog-files
[ Steve@localhost Steve ] $ _

In the above example, the directory, prog-files, is created under the /tmp directory.

DIRECTORY COMMANDS IN LINUX

Identifying the Current Directory Path


The pwd (print working directory) command is used to display the full path name of the current directory.


Example
[ Steve@localhost Steve] $ pwd
/home/Steve
[ Steve@localhostb Steve] $ _

Here, /home/Steve is the directory in which the user is currently working.


Changing the Current Directory

The cd (change directory) command changes the current directory to the directory specified.

Assume that Steve has logged in and has given the following command:

Example
[Steve@localhost Steve ] $ pwd
/home/Steve
[ Steve@localhost Steve] $ cd /usr/bin
[ Steve@localhost Steve] $ pwd
/usr/bin
[ Steve@localhost Steve] $ _

Note that the complete path name has been specified with the cd command. Linux also allows the use of relative path names with commands. Let' s look at an example.

Example

[ Steve@localhost /usr ] $ pwd
/usr
[ Steve@localhost /usr ] $ cd bin
[ Steve@localhost bin] $ pwd
/usr/bin
[ Steve@localhost bin ] $ _

In the above example, the user, Steve, changed the working directory from /usr to the directory, /usr/bin. However, he did not mention the full path of the bin directory. Since bin is a sub-directory in the current working directory, Steve just specified the directory name and Linux interpreted that the directory is under the current directory.

You can also use the .. (double dot) option with the cd command to move to the parent directory of your current directory. For example, Steve can enter the following command after logging in, to change to the parent directory of his HOME directory.

Example

[ Steve@localhost Steve ] $ pwd
/home/Steve
[ Steve@localhost Steve ] $ cd . .
[ Steve@localhost /home ] $ pwd
/home
[ Steve@localhost /home ] $ cd . .
[ Steve@localhost / ] $ pwd
/
[ Steve@localhost / ] $ _

The two dots refere to the parent directory of the current directory. Note that there has to be a space between cd and two dots, but not between the dots.

The cd command without any path name always takes a user back to the HOME directory.

Example

[ Steve@localhost bin ] $ pwd
/usr/bin
[ Steve@localhost bin ] $ cd
[ Steve@localhost Steve ] $ pwd
/home/Steve
[ Steve@localhost Steve] $ _

Recollect that the tilde ( - ) sign is used to denote the full path for your HOME directory. Let' s say there are two directories, baseball and basketball, under Steve' s HOME directory.

Example
[ Steve@localhost vga ] $ pwd
/etc/vga
[ Steve@localhost vga ] $ cd -/baseball
[ Steve@localhost baseball ] $ pwd
/home/Steve/baseball
[ Steve@localhost baseball ] $ cd -
[ Steve@localhost Steve ] $ pwd
/home/Steve
[ Steve@localhost Steve ] $ _

You can use a combination of all the above options in your cd command. Let us look at an example, if Steve wants to move from the directory data1 to data2, he would issue the following cd command.

Example
[ Steve@localhost data1 ] $ pwd
/home/steve/data1
[ Steve@localhost data1 ] $ cd . . /data2
[ Steve@localhost data2 ] $ pwd
/home/steve/data2
[ Steve@localhost data2 ] $ _


Listing the Contents of a Directory in Linux

The is command is used to display the names of the files and sub-directories in a directory.

Example

[ Steve@localhost Steve ] $ 1s /home/Steve
DEADJOE X baseball comm tennis
Desktop a.out basketball program.cc
[ Steve@localhost Steve ] $ _

In the above example , all the files and directories under the directory named Steve are listed. If the files and directories under the current directory are to be listed, it is optional to specify the directory name with 1s.

In the above output, you are shown the file names but not the types of files. The -1 option, when used with 1s displays a detailed list of files and directories

Removing a Directory in Linux

The rmdir (remove directory) command removes the directory specified.

Example

[ Steve@localhost Steve ] $ rmdir prog-files
[ Steve@localhost Steve ] $ _

Here, the prog-files directory is deleted.

A directory can be deleted using the rmdir command only if it is:

1) Empty (does not contain files or sub-directories)

2) Not the current directory

Complete path names may also be specified with rmdir.

Example

[ Steve@localhost Steve] $ rmdir /home/Steve/tennis
[ Steve@localhost Steve ] $ _

The above command removes the tennis directory, which is located in Steve' s HOME directory.

TYPES OF USERS IN LINUX

System Administrator

The System Administrator (SA) is primarily responsible for the smooth operation of the system. it is the SA' s job to switch on the system console (the machine on which the operating system resides, also known as the server machine).

The SA also creates users and groups of suers for the system, and takes backups to prevent loss of data dure to system breakdown. In Linux, the SA is also known as the root user. The SA has all the rights for the Linux system.


File owner

The user who creates a file is said to be the owner of that file. The owner of afile can perform any operation on that file: copying, deleting, and editing.

Group Owner

Consider the following situation

A project of five people from the Dynasoft Consultants Inc, is working on a software development project for a private detective agency. An analyst heads the team. The other four members are programmers. The team is working on a Linux system.

Each programmer has been given a few programs to develop. The data provided by the detective agency is of a highly confidential nature, and so the data file has been created in the analyst' s HOME directory.

One programmer may have to link (join) a program to another programmer' s program in order to test the program.

In this situation, each programmer is the File Owner of his or her own program files. Each program, however, also belongs to the other programmers, so that they can use it for linking to the file or directly access to the file.

The project team of five users is said to be the Group Owner for the file. In Linux, it is possible to define the users who willl belong to a group. A group of users are also given a name, just as a user is given a name.


Other Users

In the example of the dynasoft consultants Inc; all the users of the system who are not members of the project group are referred to as Other Users for the files of that group.

Other Users who do not belong to the particular group. For example, the users belonging to the finance department could be treated as Other Users for the payroll department.

Tuesday, June 2, 2009

LOGGING IN AND LOGGING OUT FROM A LINUX SESSION.

Starting a Linux Session: Logging in

A user of a Linux based system works at a user terminal. After you connect to the Linux system, a message similar to the one shown below appears at the terminal.

Red Hat Linux release 6.0 (Hedwig)
Kernel 2.2.5 - 15 on an i586
login: _

Each user has an identification name called the user name or the login name, which has to be entered when the login: prompt appears. At the login: prompt, after you enter your login name, you are asked to enter your password.

Linux keeps track of all the user names and the information about users in special files (the shadow and passwd files under the /etc directory). When you enter the login name and password, these are checked in the above mentioned files.


If the login name entered does not match any of the user names in the file, the login message is displayed again. This ensures that only authorised users can access the machine. When a valid user name is entered at the terminal, the [user_name@localhostcurrent_directory_name] $ symbol is displayed on the screen.

This is the shell prompt, in which user_name is the user' s login name and current_directory_name is the user' s current working directory.

The administrator assigns each user a HOME directory when a new login account is created. When you log in, you are taken directly into your HOME directory. In Linux, login names (usernames) are usually the names of the users, and their HOME directory usually, although not necessarily, has the same time.

For instance, if your user name is tom and your HOME directory name is also tom, after logging in, you will see the following prompt on the screen.

[tom@localhost tom] $

You can now start working on Linux.

You have to be careful while typing your Login name and password, as this are case-sensitive. The entire login process appears like the one shown below:

Red Hat Linux release 6.0 (Hedwig)
Kernel 2.2.5 - 15 on an i586
Login:Tom
password: [user enters password here]
Last login: Sat Sep 18 12:18:02 from 172.17.55.167
[tom@localhost tom] $

A Sample Linux Login Screen

Ending a Linux Session: Logging Out

Once you have logged on to the system, your work session continues until you instruct the shell to terminal the session.

Typing exit or logout at the command prompt ends your current Linux session.

The system then displays the login: prompt on the screen.

In order to maintain the security of files, you should NEVER leave the terminal without logging out.

Features of Linux Operating System

Features of Linux Operating System


Multi-Programming

Linux allows many programs to be executed simultaneously by different users. This feature is called multi-programming.

Time-Sharing

Multi-programming is made possible on the Linux system by the concept of time-sharing. The operating system has to manage the various programs to be executed. The programs are queued and CPU time is shraed among them. Each program gets CPU time for a sepcific period and is then put back in the queue to wait its turn again as the next program in the queue is attended to.

Multi-Tasking

A program in Linux is broken down into tasks, each task being something like reading from or writing to the disk, or waiting for input from a user. The ability of an OS to handle the execution of multiple tasks is kn own as multi-tasking.

When a task is waiting for the completion of an activity, the CPU, instead of wasting time, starts executing the next task. Therefore, while one task is waiting for input from the user, another program could be reading from the hard disk.

To explain the concept of multi-taskign, let's make a simple example. You are having a cup of coffee, reading a book, and talking to your friend over the phone. You are actually performing more than one task simultaneously.

However, at a given point in time, you would be either sipping coffee, reading the book, or speaking over the phone. As you notice, you divide your time into smaller units and in each unit of time.

you would be doing only one of the tasks. Similarly, the CPU divides the time between all the active task.
The kernel is responsible for scheduling the tasks.

Linux Compared to Unix

Linux was developed keeping unix as preference model. Hence, the basics architechture and most of the features of Linux and Unix are the same. In fact, Linux is also considered another version of Unix. The main difference between Linux and Unix is that Linux is Free. Various distributors pf Linux do not charge a price.

but the price is quite low compared to other operating systems. What you get is a full-blown server operating system-- with NO licensing issues. Linux comes with all the development tools you could possibly require-- C, C++, FORTRAN, Pascal, and lot of scripting languages like awk, Perl, and Python, most of which are free . Also, Web servers like Apache, amd browsers such as Netscape provide their versions for Linux, again free.

The Unix operating system requires atleast 500 mb of hard disk space., whereas Linux can be installed on a computer with a little as 150 mb of hard disk space and can run on 8 MB of RAM.


Features Linux Unix
Shells available bash, pdksh, tcsh, zsh, ash Bourne, Kom, C
Variants Red hat, Calders, Debian, LinuxPPC, SUSE AT & T, MULTICS, TICS, BSD, SCO, HP-Ux, IRIX, Ultrix, XENIX Sun Solaris

Licensing

Freely distributed

Expensive licensing

The Advantages of Linux

The Advantages of Linux


Reliability

Linux is a stable operating system. Linux servers are nto shut down for years together . This means tht users on the Linux operating system work consistensly with the Linux server, without reporting any operating system failures.

Backwadrd Compatibility

Linux is siad toe be backward compatible. This implies that Linux has excellent support for older hardware. It can run on different types of processors, not just Intel. It can run on 386 and 486 Intel processors. It also runs well on DEC' s Alpha processor, Sun' s SPARC machine, PowerPc and SGI MIPS.

Simple Upgrade and Installation Process

The installation procedure of most Linux versions is menu-driven and easy. It includes the ability to upgrade from prior versions. The upgrade process preserves the exisitign configuration files and maintains a list of its actions during installations.

Low Total Cost of Owership (TCO)

Linux and most of the packages that come with it are free therefore the total cost of ownership in procuring a Linux server software is low. Also, there are a lot of people and organizations providing free support for Linux, so the cost of support can also reduce. The system configurations reuirements for installing a Linux machines is less, hence the hardware cost goes down.

Support for Legacy Devcies

Linux can run on a machine with low configuration , such as 386 DX/ Users who have low and configuration machines prefer to use Linux compared to other PSs that require configuration.

GUI InterFace

The graphical interface for Linux is the X Window system. It is didvided into two web systems consisting if a server and client. Linux has a number of graphical user interfaces called desktop Environments , such as k desktop Enironment (GNOME), both of which are versions of the X Window system. They run in the x sever.

when u start in KDEM the desktop is organised into folders such as an autoshart, trashcnn
CD-ROM , Printer, and floopy drive. all these folders are simbolized pictorially by icons. When u click on an icon the k manager pops up a browser windw.


Wednesday, May 20, 2009

Functions of an Operating systems

Command Interpretation

The Central Processing Unit (CPU) needs to understand a command keyed in a user. It can interpret only binary code, that is, code containing O's and 1's . A command keyed in by a user has to be translated to binary code for the CPU to understand it. An OS performs this task.

Memory Management

Memory management is the mechanism by which an OS handles requests for memory. With the development of highly sophisticated software, memory requirements have increased drastically. An OS has to take care of allocating memory to the various applications running on the system . It has to allocate optimum memory to the applications and clean up necessary data from the memory.

Peripheral Management

An OS has to take care of the devices (peripherals) attached to the computer. It handles the communication between the CPU and the printer or the modem

Process Management

To enable several programs to run concurrently, an OS has to ration out the CPU time. It needs to ensure that all the programs get a fair share of the CPU time and no program monopolizes the CPU time.

The functioning of an operating system depends to a great extent on the computer system on which it is located. Since there are two basic types of computer systems - single user and multi - user - there are two types of operating systems. Before you learn about the details of operating systems, let 's first have a brief look at the two types of computer systems available.

Operating Systems

An operating system (OS) is a software program that acts as an interface between a user and a computer. The OS manages the computer hardware, the system resources, the memory, and the interaction between the system and its users. The OS also forms the base on which application software is developed.

Some popular operating systems are:

  • Linux
  • Unix
  • Microsoft DOS
  • Microsoft Windows 95
  • Microsoft Windows 98
  • Microsoft Windows NT Server 4.0

Sunday, April 12, 2009

schedule a new post on blog

schedule a new post means if you want to post a new post on your blog on the following date,but on that date you need to go out on some holiday and if u cannot post on that day.schedule post on blogger will help you for this.it will post the same post on the same day and same time which u want.

Read below info how.

1) login to your blogger account and go to create new post section.

2)create a new post and write your post there.

3)after that click on post options,
1.jpg image by sample_020


4)then u will find post date and time,now u enter the date and time when u want the following post to be published on your blog.click on publish.
postdateandtime.jpg image by sample_020
5) now u can see your post is labeled and u can see scheduled written over there,now u post will be visible on the following given date and time

Friday, April 3, 2009

add programs in Quick Launch section of Taskbar in Vista

  • Open Programs menu through the Start Button (located in the lower-left hand side of the desktop.)
  • Right-click on the program or application you wish to add to Quick Launch. In the resulting pop-up menu, select "Add to Quick Launch".

Last program now comes in the Quick Launch section, located to the right of your Start Button.

Thursday, April 2, 2009

simple way to add blogger footer in blog


want to add any text to ur blogger footer.well this are the 4 simple ways of adding footer in your blog.this works.


  • Go to your blog dashboard.
  • Go to "Layout" and add a new gadget at the bottom.
  • Add a link code to your home, add an email link and add a link to your feed.
  • your template and see the new footer in your blog

Tuesday, March 31, 2009

Your Private Server Web Hosting

Shared hosting allows thousands of people to host their own sites at a very reasonable cost. It has some drawbacks, however. Since hundreds of sites can be hosted on a single server resources such as CPU, disk space, and bandwidth have to be shared with your virtual neighbours.

Shared resources are usually not a problem for small to medium sized sites. Your main limitation is the lack of control over system level software – http servers, mail servers etc. You don’t have any choice of operating system and you cannot compile programs or do administrative tasks such as setting up Spam filters or firewalls.

Many people would say ‘So what? I don’t want to do that stuff anyway!’ It’s true that the majority of website owners have no interest or ability to handle this kind of work and are happy to leave it to the hosting company. Those who desire more control over their server environment or wish to experiment with new software, however, can get access to this level of management with a Virtual Private Server.

A virtual private server (VPS) is a physical server that has been divided (using software) into several virtual machines, each acting as an independent dedicated server. The physical resources such as RAM, CPU and disk space are still shared, but each VPS acts independently of the others. Each VPS can have a different operating system and can be configured in any way possible.

The key advantage of VPS is allowing each VPS administrator access to the root level of his virtual server. This kind of access allows the administrator to install and delete software, set permissions, create accounts – in short, do everything that the administrator of a ‘real’ sever can.

As well as providing more control over your hosting environment, a VPS Web Hosting is more secure than shared hosting. Websites on a shared server all have the same operating system, so if a hacker were to find access to the root of the server he could damage any or all of the websites on that server. A VPS, on the other hand, is divided in such a way that even if a hacker were to gain entry through one account, there is no way to access the others. Each VPS is invisible to the others and there is no way to set up root level access from one VPS to another.

Virtual Private Servers can be set up in various ways so be sure to understand how the hosting company has allocated resources. The most common configuration is to divide all the physical resources evenly by the number of accounts. Thus, if there are 10 virtual servers, each would receive 10% of the total bandwidth, CPU, memory and disk space.

The disadvantages of VPS are almost the same as the advantages. The control that a VPS account provides can be dangerous if you don’t know what you are doing. You have the ability to delete files, set permissions improperly, allow virus-laden software on the system and, in general, really screw things up. If you don’t have the knowledge to administer a server, or are not willing to learn, VPS is not for you.

If your website has outgrown shared hosting, however, VPS offers an affordable alternative to dedicated hosting. When shopping for a VPS host, be sure to find out how system resources are divided up, the number of VPS accounts on each physical server, the method for upgrading, and the choices of operating systems.

what is colocating hosting

Colocation

Colocation is accentually where you lease space from a professional datacenter. This is option to use for people they need physical access to the hardware. Usually collocation is a more expensive option however you do have more control over your server.

Colocation Facility

Also, make sure that you are getting your moneys worth. Looking for the right colocation facility to host your servers or sites? First off, colocation is great if and only if you have a strong, working relationship with the facility. You need to know that at 2AM when your mission critical online application goes down, that you will be able to get into the facility (either you or your technician) to make the necessary changes. Many colocation facilities over-charge for bandwidth because, frankly, thats all that they really sell you. Make sure that it wouldnt be cheaper and easier for you to run fiber to another location on your own. If you can get a managed colo option, you should definitely do it.

Dedicated Colocation Server

In the strange world of web hosting, you actually pay more for uncertainty. There is certainly a premium on dedicated colocation servers, but if that is what your company needs - go for it. Getting a dedicated colocation server? Be careful, as costs can be high and uncertainty can be even higher. In return, you are getting customization and control. With a dedicated server on colo, you have (almost) complete control over your server and its applications. Alternatively, you can get shared hosting with almost no customization for a handful of change every month. Just make sure you find a reliable, accessible provider that can handle your specific colo needs.

Colocation Hosting Provider

So, what makes a colocation hosting provider better than another? Unlike many other organizations in the hosting industry - location matters. While colocation facilities can provide you with a managed network and guaranteed connectivity, they will not be able to updated and edit your mission critical software. For most businesses lookinginto colocation hosting, the provider that is located nearest you or your tech staff is the best option. Of course, reputation matters to. Ask the colocation hosting provider to give you some of their clients names and contact their tech staff to get the low-down on exactly how good that colo hosting provider is. Having a colocation hosting provider in your area is the best solution.

Colocation Hosting

Colocation has its charms, but it is especially useful for mission-critical online applications and data-serving, not just sending out web pages. Using your colocation facility to host your website might be overkill. If you are really interested in simply serving pages, look into a simple dedicated server provider or a VPS system. Either one of these will allow you to have the control and processor needed to accomplish the majority of your web hosting needs, without paying the expensive bandwidth and managing costs normally associated with colocation hosting.

Colocation Discount Web Hosting

Colocation discount web hosting is a growing trend in America. Purchasinga colo server allows you to keep your data behind a professional infrastructure. We recommend several colo offerings here, but if you dont go with them,make sure that you direct access to your server and the colocation facilitiesat every minute of the day. The last thing you want is your colocation serverto go down in the middle of the night and not have access. Getting this at a discount is not as easy though, as colocation is more expensiveand gives you a lot more space and bandwidth than your average shared hosting. Colocation discountweb hosting can be very useful, but make sure the discount doesnt mean cheap!

Server Colocation

There are a lot of good reasons to pursue server colocation. Most server colocation providers give you access to network specialists who are familiar with their running technology and keeping you connected - yet another added benefit of server colocation. Colocation gives you added control over your web presence without actually paying the expensive bandwidth and infrastructure costs of developing your own datacenter. Colocation is quickly becoming a method of lowering IT costs. If your server colocation facility provides current, reliable technology and services, you can save significantly on all of your server needs.

Colocation Services

When running through the array of colocation services, make sure that they can actually host your particular set up - whether it needs a 1U rack mount, a horizontal cage, vertical cage, quarter cage or half cage. Ask the colocation services exactly how long their systems can run on generators. Make sure that they have redundant connections, gigabit ethernet or OC-12 connectivity, multiple HVAC systems and repeated back up power systems. Generators are also extremely important, given the comonality of natural disasters and power outages. If they cant give you a solid answer about this and all of their colocation services, find another colocation provider.

You can Start Your Own Web Hosting Business

Rather than use the services of a web hosting company to host your web site you could start your own web hosting company. If your business is successful this could provide secondary income and lower the hosting costs for your own site(s).

Basically, there are two ways to start selling web hosting. The first way involves leasing business space, buying equipment, setting up servers, leasing T1 or T3 lines to connect to the Internet, finding clients, and hiring staff to provide 24 hour support. Quite complicated and not recommended for anyone without the technical know-how.

The second way is to become a re-seller for an established host. For a monthly fee you can have an allotment of disk space and bandwidth which can be used to sell to other people. Re-selling is usually anonymous – there is no visible connection to the parent host and you are free to set your own prices and develop your own ‘brand’.

All that is needed to become a re-seller is the ability to pay the monthly fee. All the technical details are handled by the parent company. The re-seller package usually includes everything – even name servers under your own name. All you have to do is to sign up customers and watch the money roll in. Easy – right?

Signing up customers, though, may not be as easy as you imagine. There are literally thousands of hosting companies competing for customers, and making your web hosting business stand out from the crowd is no mean feat. Just think about the process you went through in choosing your own web host. You probably visited several hosting web sites, maybe asked for personal references from your friends or business acquaintances, and then after narrowing down your choices, perhaps did more in-depth research on each of the companies. Or perhaps you just signed up with the first host you saw.

So, in order for your own hosting company to be successful it has to build up a good reputation or be easy to find. Advertising can make your company more visible, but advertising is expensive – especially in a competitive market like web hosting.

A re-seller account, however, may be ideal for certain situations. If you already have several websites of your own, your monthly costs may be similar to a re-selling account. For the same amount of money you could switch all your accounts to your own hosting company. Sign up a few friends or associates and you are ahead of the game.

If this sounds attractive, make sure you are going with a reputable hosting company. You will be entirely dependent on them for technical support. This relieves you of many of the headaches of running a hosting company but you are still responsible to your clients if their sites go down.

There are many types of re-seller packages. Some require you to operate under the name of the hosting company while others allow you to set up a shop under your own business name. Pay attention to the billing aspect of the package. Some re-seller accounts have everything you need to get started immediately, while others require you to set up your own billing gateway.

Saturday, March 28, 2009

Computer Repair: Replace Computer Memory

There are lots of computer repair jobs you can do yourself to save money. One DIY computer repair is to upgrade your computer's memory (or RAM). More computer memory allows more space for your operating system and software to use. This in turn enhances the speed at which your computer operates. It is easy to do this yourself and will save you lots of money.


Step1
The first step in this computer repair is to disconnect the power from your computer. Safety first!
Step2
Remove the cover from the case.
Step3
Look for where your RAM memory is located on your motherboard.
Step4
Once you find where your memory is located, check to see if there are any available empty memory slots.
Step5
If there are no slots available, then remove the old memory by unlocking the levers that are located at each end of the memory slot. The memory should release itself from the slot.
Step6
Place your new chip in the empty slot. The chip only can go in one direction. There is a notch in the chip. It should line up with the socket. Levers should lock in place automatically.
Step7
Apply slight pressure to make sure the chip is firmly seated in the slot.
Step8
Put cover back on your computer.
Step9
Turn on the computer and give yourself a pat on the back for doing your own computer repair and saving money!

Choose and Install a Graphics Card

If you can't play Crysis, read this. You obviously have a bad graphics card and you need a new one.


Step1
Before you buy, you should know what purposes are you going to use your graphics card for. The main reason people buy graphics cards is that their old card sucks and they want to play certain games (Crysis). Anyways, you need to choose a card based on your budget, power supply output, space in your compueter case, and what you are going to use the card for. I'm assuming you're going to play Crysis, so you should pick a card that has at least 512 MB of VRAM. Once you've picked a card and made sure you've got enough space in your case for it, you need to check if your power supply is good enough. Open up your case and look at the side of your power supply. Somewhere on the side there will be a sticker telling you the combined output of that power supply in watts. A Crysis compatible card should need about 450 to 600 watts. If you have to install a new power supply, read another guide.
Step2
When you are done choosing the card, buy it and wait for it to arrive in the mail. Once it comes, carefully lift the card out of its box and set it on a flat surface. Using the screwdriver to open your case, set the side of the case away and proceed to take the graphics card out of its antistatic bag. Make sure you are wearing an antistatic wristband to avoid damaging the parts. If you do not have an antistatic wristband, handle the card using latex gloves.

Step3
Locate the PCI Express (2.0) slot on your motherboard, make sure the area around the slot is not full of cables. Making sure that the side of the card with the metal bar on it is facing towards the back of the case and proceed to insert the card in the slot. Do not apply large amounts of pressure on the card or you risk breaking it or your motherboard. Carefully nudge it inwards until it will not go any further. Find the latch at the end of the slot and push it down, this will ensure your card does not displace itself.

Step4
Plug your monitor into the DVI or VGA outputs on your card. Turn your computer on and you should see the image on the monitor in a low resolution. Log in to Windows and insert the disc that came with your card. Install all the necessary drivers and restart your computer. It's all good now.

Choose a Wireless Adapter for Your Computer

You want to connect to a wireless network, but you need an adapter. Learn how to choose a wireless network adapter for your computer.


Step1
Interface: The two most common interfaces are PCI and USB. The network adapters that use the PCI interface tend to be both cheaper and more reliable, though maybe not as convenient to install. To install a PCI network adapter you'll need a free PCI slot, and need to know how to install a PCI card in your computer To install the USB version, you just plug it in an available USB port.

Step2
Security: Get a network adapter that supports the highest level of security your router supports. To find out what level your router supports, find its manufacturer and model, and look up the specs online.

Step3
Antenna or no Antenna: A network adapter with an antenna is usually able to broadcast a further distance than an adapter without an antenna. If the computer you're using will be far away from the router, consider getting a network adapter with an antenna or even a hi-gain antenna for the strongest signal.

Step4
Wireless Lan Version: Check the specs of your router, and get the highest version adapter it supports. The latest version is 802.11 "n," followed by "g," and "b."

Choose a Sound Card for Your Pc

While integrated sound has come a long way since the early days, nothing beats a sound card to increase not only sound quality, but PC performance as well. Learn what you need to know to choose a sound card.


Step1
Number of Channels: What you should get depends on how many speakers you have. The most common are 7.1 channel cards followed by 5.1 channel.

Step2
Sample Rate: The most common is 96KHz, though there's some above and below. The higher the sample rate, the better the sound quality.

Step3
Ports: These can include Line In, Line Out, SPDIF In, SPDIF Out, Mic In, MIDI/Joystick, just to name a few. If you need it, there are sound cards that have it.

Step4
SNR: This is the signal to noise ratio. Cards fall in the range of 86dB to 120dB, with most falling in the range of 103dB and 110dB. The higher, the better.

Step5
Bit Depth: Most sound cards are 24-bit, though there are a few at 16-bit. The higher the bit depth, the better the audio will likely be.

Step6
Interface: Most cards connect via plain old PCI though there are a few that connect via PCI Express. Make sure you have the right kind of slot available for your card.

Buy a Graphics Card with the Correct Frame Rate

Frame rate is an overall test of the efficiency of a graphics card as regards speed. It depicts how many complete images can be displayed by a graphics card in one second. It is measured in frames per second (FPS). Frame rate has two components, called triangles or vertices per second (how many vertices of a polygon can be measured in a second) and pixel frame rate (how many pixels it can convert in a second). The higher the frame rate, the smoother the onscreen movement. A high frame rate is a must for 3-D games. The following steps will help you to buy a graphics card with the correct frame rate you need.


Step1
Decide on the type of games you would like to play on your computer. If the output is in the range exceeding 25FPS, the human eye will not be able to distinguish individual frames. High- paced games, such as first person shooters, will need an FPS of 60 or more to provide smooth scrolling and fluid movements.

Step2
Check the type of monitor you have. In the classical CRT (Cathode Ray Tube) monitors, resolutions can be set until it exceeds the maximum physical resolution that the screen can support. In the case of TST (Thin Film Transistor) monitors, the physical resolution can’t be set as they have fixed resolutions. In this case, it is better to choose a graphics card that supports the resolution setting of your TST monitor.

Step3
Decide on the screen resolution you would like to set. If you want a high resolution to be fixed, you'll need a higher frame rate. A higher screen resolution allows more pixels to be displayed on the screen, which makes the output more detailed. The most widely used resolutions are 1280 x 1024 and 1600 x 1200.

Step4
Assess the ability of the graphics card to provide a high frame rate. Check the pixel fill rate. Determine how many megapixels it can process per second. If you want to play advanced 3-D games, a higher frame rate is what you need. Currently, 1024 x 768 pixels is regarded as an acceptable gaming resolution.

Step5
Check the memory bandwidth of the card. This will measure the speed with which the processor will read and write data from memory. More memory bandwidth will ensure a better performance.

Step6
Check the prices of available graphics card with your required frame rate. Generally, a card with higher frame rate will be more expensive than one with a lower frame rate. Use search engines to look online for the prices of different cards and compare them.

Step7
Decide whether you want to purchase online or from stores. Generally, online shops will provide you with more discounts than local stores. If ordering online, don’t forget to check the cost of shipping and handling. Browse through popular online stores such as CompUSA, Best Buy and Circuit City (see links below).

Add Memory to Your Computer

A lot of people think they are ready for a new computer when their current one begins showing signs of old age. If you have already performed other steps to speed your pc performance to no avail, you may want to consider adding memory (RAM).
This is a very effective way to save money by prolonging the life of your pc by a few years.

Step1
Computers are made with memory upgrades in mind. For instance, one of my previous computers, a DEll Desktop came with only 256MB (megabytes) of memory (RAM), but could be expanded all the way to 2GB. That means the computer could take 8 times the memory it came with when I bought it!
The first thing you need to do is look up what kind of RAM your computer uses and what the limit is. The best way is to peruse the website for your pc manufacturer and performing a search by model name or serial number.

Step2
PC Memory, or RAM After you've acquired your memory sticks, which are shown in the photo, you will need to unplug your pc and pop it open.

Step3
Memory slots You'll see slots, like the ones in the photo, where the RAM will be placed. Depending on how much you purchase, and how many total slots you have available, you may have to remove all the current memory sticks. Just pop them out, line up the teeth of the new ones with the slot, and firmly press down until you hear them pop into place.
Enjoy the money you saved!


Let Visitors Email Your Blogger Post to Friends

Blogs are basically Internet diaries. A blog may contain articles, pictures, news or links to other Web sites. One way to make it simple for your blog visitors to share your blog posts with their friends is to add an email button to your blogger post. The steps below only take a minute to do.


Step1
First you need to log in to your Blogger Dashboard.
Step2
Scroll down to the section titled "Blogs." This is a list of the blogs you have created.
Step3
Click on "Change Settings" next to the blog you want to add the email option to.
Step4
On the new page scroll down to "Show Email Post links."


Step5
From the drop down list click on "Yes."

Step6
Make sure you click on "Save Settings."

Step7
You will need to "Republish" your blog to see the changes on your blog.

Step8
Now when you view your blog at the bottom of each blogger post you will see posted by 'name', the time posted, number of comments and an icon (envelope) that visitors can click to email your blogger post to friends.

Get Paid To Blog - Paid Blogging Networks

How to Get Paid To Blog - Paid Blogging Networks

Instructions
Step Using Notepad... In Notepad or other text editor, make a list of 7 to 10 keywords that describe your blog site. Then, beneath this list, create and write a keyword-rich description of your blog. Save it! You're going to need to copy and paste this information on your applications to paid blogging networks. Trust me, this will save you a ton of time. Step2 Browse the following paid blogging network sites (direct links to these sites are found at the end under the Resources section):

PayPerPost.com
These folks pioneered the "get paid to blog" concept. Besides being the most popular paid blogging network, I've found that they always seem to have the most job opportunities available at any given time. PayPerPost pays bloggers anywhere from $5 to over $200 per completed and approved post.

Bloggerwave.com
Although Bloggerwave is a smaller paid blogging network and lists fewer open job opportunties, their site is super blogger-friendly and easy to to navigate. Bloggers here get paid a minimum of $10 for each completed and approved post. Bloggerwave also pays on time and like clock-work.

Smorty.com
You'll like Smorty because they pay from $6 to $100 for each post and they pay-out weekly. A great feature with Smorty is that bloggers are allowed to have multiple blogs so income earning potential is unlimited. The Pagerank of your blog along with a high Smorty smart score determines how much you can earn - up to $100 per post.

ReviewMe.com
Bloggers - get paid to review products and services on your site. You control what you review. You will be paid $20.00 to $200.00 for each completed review that you post on your site.

LoudLaunch.com
With LoudLaunch the amount you are paid per post is based on your blog ranking? LoudLaunch allows bloggers to be compensated for distributing our advertisers LoudLaunch press releases. Search through our advertisers latest press release campaigns, select campaigns aligned with your blog, post a Micro Press Release on your blog based on the advertisers campaign, and be compensated based on the exposure your blog can deliver.

Blogitive.com
Once you are approved to the Blogitive system, you are given access to opportunities from companies to post about their news releases. You are paid per posting. The standard amount is per post is $5. This may vary depending on the sponsor. You must have a PayPal account in order to get paid with Blogitive.

BloggingAds.com
BloggingAds is different. They supply the advertisers, the text and the money, all you have to do is post the ad on your blog. We are looking for bloggers to post one-time ads on their blog sites for money.

List continues below... Step3 SponsoredReviews.com
A Sponsored Review is an article you write for an advertiser. You review their products and services and then post the review on your blog. Each advertiser has his or her own requirements. Bloggers can earn anything from $10 to $500+ for each review.

BlogsVertise.com
Once approved, your blog goes into the assignment queue. The blogsvertise administrator then assigns writing tasks for what our advertisers want you to mention in your blog. The current payout rate for new accounts is $4 - $25 per entry.

PayU2Blog.com
If your blog meets our requirements then you can make money blogging in our system and you can count on Payu2blog to deliver that consistent steady income from advertising on your blog.

CreamAid.com
CREAMaid is a service that lets you meet other bloggers with similar interests, and make money while doing it. Anyone can start using CREAMaid by inserting a CREAMaid Conversation widget inside her post. When your post is selected, you will be able to instantly collect a royalty for your contribution (usually about $5).

Contextual.v7n.com
Do you own a blog? Blog publishers in the Contextual Links @ V7N Network make cash and get paid by PayPal for simply adding text links to their blog posts. Currently publishers make $10 per link.

LinkWorth.com
LinkWorth is a search engine marketing company that offers a variety of monetization options for bloggers. LinkWorth gives up to 70% of the revenue for its ads.

InBlogAds.com
If you have a blog, you can make money simply by reviewing other websites. You receive 60% of the sale price for each review.

DewittsMedia.com
Your blog must have a minimum Page Rank of 3 to be accepted. You get paid a flat fee of $10.00 per post.

LinkyLoveArmy.com
Your rate of pay to blog for this company is based on your Google's PageRank (from $5 to $16 per post).

PayMeToBlogAboutYou.com
The process is simple! Register, look for bloggers or advertisers, negotiate back and forth via the messaging system, strike a deal, BUZZ and compensate!

BlogChex.com
Migrate your existing blog or start a new one . Refer a friend and get 5% of what the friends blog site makes. Promote your blog and get paid.

Step4 Apply to as many of the above listed paid blogging network sites as possible. Why? Your blog may not be accepted or approved by some companies, so you're going to want to make sure that you're getting every opportunity possible to get paid to blog.

After applying, be patient. Some networks have a fast approval process, while others seem to take forever. I'm still waiting on some of these.

Step5 Write, blog and make money! Good Luck!

Get Three Free E-books for Bloggers


Whether you are an accomplished blogger aspiring to be a blogger, these books will be helpful. Learn to develop your craft to become a successful blogger. Here are three e-books for writers you can get for free.


Step1
Improve your Writing Skills - Improve your Writing Skills, is an e-book that can help you every your basic writing skills, they explore punctuation, grammar editing as well as lay out.

Step2
Blog Bash - Blog Bash, is an e-book with tips from 30 professional bloggers. They offer you great tips on how to blog successfully and give you the benefit of their experience.

Step3
Blogging for Profits - Blogging for Profits, tells explores the reasons why 90% of blogger make most of the money. It also tells you what pitfalls to avoid so that you can begin to make more money. Click on the links below to download your free e-book.

Become a Paid Blogger


Blogging is one of the easiest and most casual styles of writing on the net. It can be about anything of personal interest, a particular theme, or just random ramblings, and chances are that over time a dedicated audience will grow to bring in a paycheck for the hobby blogger. The best news of all is that there are blog sites who will pay per post, plus traffic bonuses, and no experience is necessary.


Instructions

Difficulty: Easy
Step1
Follow the link in the resource section of this article to start blogging at "Today." The organization is a linked network of blogs that are designed to give everyone a voice who wishes to be heard as well as a forum to communicate, trade blogging tips, and comment on fellow blogger's pages to increase traffic to your own.

Step2
Use the template to customize the direction and style of the blog. "Today" provides this template for all users so that "Today" blogs will be recognized above and beyond the mass of existing blogs already available. This step will involve making a decision on a content theme so that viewers will know what to expect and have a reason to come back to view more posts. Keep in mind that the more popular a theme is, the more viewers the blog will attract, so go for a theme that seems interesting and will be fun to write about.

Step3
Market your blog to increase the blogging paycheck. "Today" pays its bloggers by the post as well as by the amount of traffic the blog receives, so the amount paid can continually go up according to the amount of time spent marketing the blog. This is much easier than it sounds, and usually involves posting on other blogs with a link to your own blog, telling people about it in internet forums and chat rooms, and even emailing friends to see if they want to check it out.

Identify Anonymous Bloggers who Defame You

ANONYMITY: Who wrote that?
Anonymous free speech is a wonderful privilege protected under the US First Amendment.

However, malicious antagonists using anonymity to spread lies behind the cloak of anonymity are NOT protected by the First Amendment. 

The U.S Congress, in all its wisdom, enacted a law that effectively grants Federal immunity to blogsite owners, forums, ISPs, search engines and any online service that "re-publishes" the libel. Even if you demonstrate to the ISP's board of directors the falsity, they can ask you to leave and do nothing to remove it from their servers. 

A victim does not have many options, but here are a few tips that our team have used to help our clients.


Step1
Make sure you save regular copies of the offending-web page in case you need to demonstrate how long it was visible and any variations or changes. You can save the HTML file in most browsers by choosing FILE>>SAVE; using this method you can save all the associated files such as images etc.

Step2
If the blog postings do not have the date/time stamp visible, you should note as accurately as possible the date it appeared. This may be needed for backyard blog site owners who may be subpoenaed. Many don't have good records or do not know how to read their logs.

Step3
Journal / log all instances of lost business or expressions of concern about your character by individuals as a result of the libelous anonymous blog posting.

Step4
If you notice similar patterns of writing styles with different blogger pseudonyms, be sure to keep detailed records, notes and cross-references. Often one person pretends to be many in an attempt to give the appearances of a grass roots uprising against you. This is called "astroturfing"; if you do end up in court this helps in proving "malice" which in some jurisdictions adds a whole new level to the damages that may be awarded.

Step5
You cannot prevail in court if you litigate against an ISP or blog site administrator (except if he/she is the actual author of the libel). In order to identify an anonymous blogger you will probably need to file a "Your Name vs. John or Jane Doe" civil suit in the appropriate jurisdiction. Identifying the best jurisdiction can be tricky as some ISPs such as Google will usually only honor a court order from their state (California).

Step6
Once you have filed an action you will need to have the court issue a subpoena, or in some cases an actual order for production. Many ISPs will resist this so it is imperative that you are very, very careful, thorough and yet concise in the justification/explanation for the production requests. I have learned by trial and error and have perfected the task in so much as it is possible. You need to find a balance between the techno-speak for the ISP's records team and plain English so the Judge doesn't get lost.

Step7
Once you obtain the production/documents from the ISP you will probably need to request additional subpoenas for other ISPs as you track down the electronic foot prints of your antagonist. If you do everything just right, you will be able to positively identify all but the sneakiest of the cowardly minority that take pleasure in inflicting pain on us without a conscience.

Twitter Delicious Facebook Digg Stumbleupon Favorites More


Categories